


Alternate drones are very difficult units to use if you aren’t familiar with them. They introduce a bunch of new possible openings, and you often want to be using them even on turn 1, meaning that it pays to know how to use them properly.
There are far too many possible openings with these units to go over every single one, especially with the flexible units like Doomed Drone and Galvani. Instead, I’ll give an overview of how the unit is used, and then list a few important openings with each drone.
Doomed Drone:

The key to this unit is whether or not it can defend on its last turn of life. One point of health is worth a little over 2 Gold, meaning that getting to defend with the Doomed Drone on its last turn of life is over twice as good as mining with it. If a Doomed Drone does get to defend on its last lifespan, it’s very high value, while if it doesn’t, it’s slightly less efficient than a regular Drone. So, you usually use Doomed Drone in one of two ways:
One way is that you make it early on – meaning you most likely won’t get to defend with it – as a tool to smooth out your builds. A Doomed Drone used this way is slightly less efficient than a regular Drone, but much more efficient than floating Gold or wasting Energy in the opening, meaning that Doomed Drone being in the set makes a lot of the builds that are usually skipped over due to their inefficiency (such as Elyot Animus, or player 2’s Masterbot opening) stronger and more viable. Used this way, Doomed Drone makes your choice of tech building very flexible; you can get any tech building out, with any timing, efficiently… with the exception of player 1 trying to get a Conduit out at a medium timing.
The other way to use a Doomed Drone is to make it a bit later on, once you’re done making regular Drones, with the expectation that it’ll get to defend. Doomed Drones used this way are really great value if successfully used this way, so you’ll often see players buy out all of the Doomed Drone supplies this way.
Doomed Drone Openings
In the opening sections, I’m not going to cover the most common openings used with these drones – this is because a lot of the common openings would be the same, or very similar, to the openings covered in my post on Common Openings. Instead I’ll focus on a few builds that I feel you should be aware of, or openings that are the easiest to make a mistake in – often these will be the high economy builds, although not always.
Player 1 fourth Engineer: 1. DD 2. DDE 3. DD1E 4. DDDD
Fourth engineer builds are more viable with doomed drone in the set, since doomed drone makes the opening more efficient and also makes it easier to spend the four Energy. That said, it’s still rare – it’s more common to stick with player 1’s standard three engineer build, 1. DD 2. DDE 3. DDD.
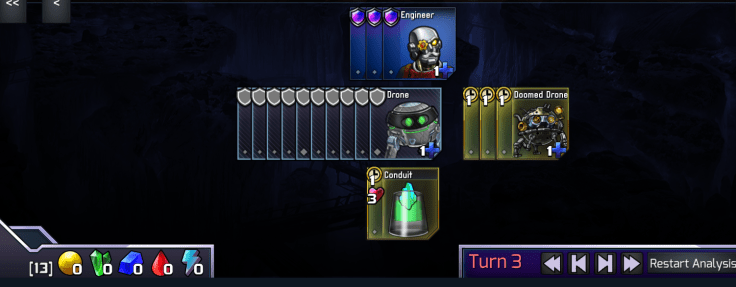
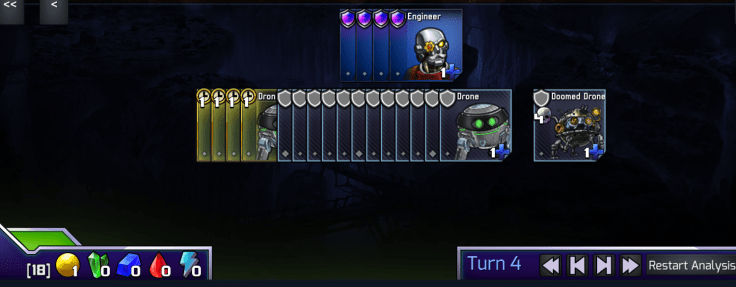
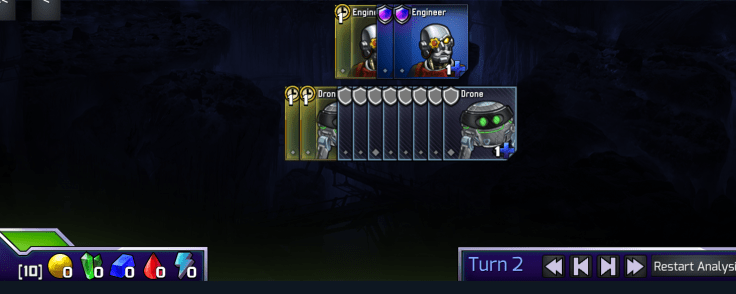
Player 2 third Engineer: 1. D1E 2. DDD
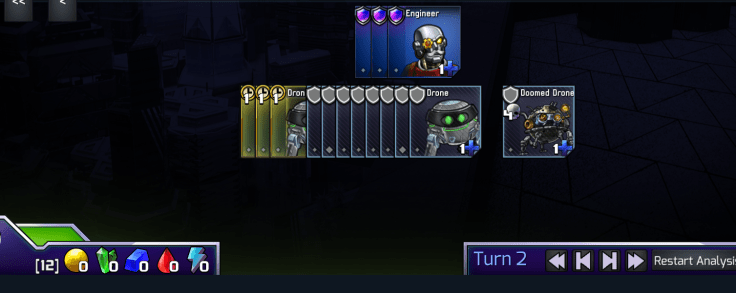
This build is your go-to build in any set that’s mid-high or high economy. It’s very slightly better than player 2’s normal third Engineer build (1. DD 2. DDE). To illustrate that, let’s compare how both lines do at getting a Conduit on turn 3:
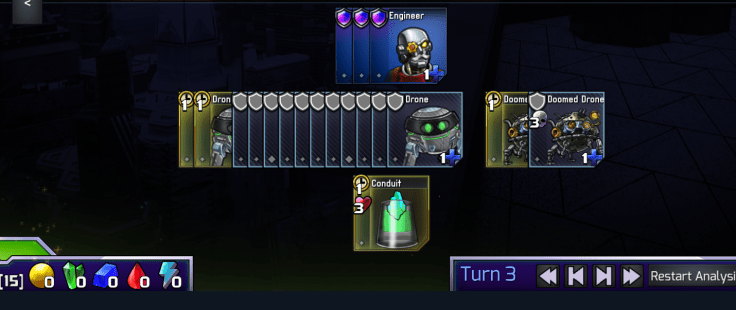

- 1. DD 2. DDE 3. DDDC
The Doomed Drone opening gets you two Doomed Drones – one fresh one, and one on lifespan 3 – in exchange for one less regular Drone. The two Doomed Drones are worth a tiny bit more than the regular Drone even if neither one of them gets defensive value, so if you’re looking for a high econ as player 2, this is your go-to build.
If you want a very big economy, you can get a fourth Engineer on turn 3 with 3. DDDE. This is slightly more efficient for high economy than the other possible fourth Engineer build, 1. DD 2. DDEE, meaning that if the set seems like a high economy one, you should always open with 1. D1E. (Originally I thought that 1. DD 2. DDEE was the better high econ build – thanks to Toothless for the correction).
Galvani Drone:
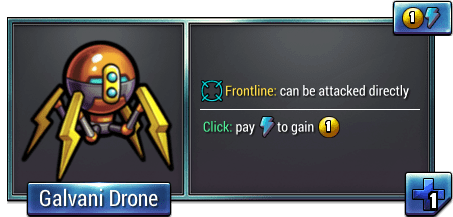
Galvani Drone is the same efficiency as a regular Drone. One Galvani Drone is 1E for plus one Gold income but minus one Energy income. So, one Galvani plus one Engineer costs 3E for +1 gold income per turn, the same as a regular Drone.
Since it’s frontline, making it early on leaves you open to having your absorb denied. Because of this, you still use Drone as the base of your economy, and primarily use Galvani Drone as an Energy sink. Usually, once you’ve switched to making attack, you have no more use for energy and let it go to waste every turn. With Galvani Drone, you can convert your Energy into precious Gold. Because of this, Galvani Drone helps out low econ builds that cut Drones a lot – those builds stop using Energy very early on, meaning they get a big boost out of sinking their Energy into Galvani Drones.
Galvani Drone can also be used to play around threat – or specifically, it enables your Engineers to play around threat, by making them into vigilant units that produce Gold while blocking.
One situation that often comes up is that your opponent has some Galvani Drones up, and killing them doesn’t deny absorb – so you have to choose between killing the Galvani Drone or doing an extra damage to your opponent’s blockers. As a rule of thumb, you should do the extra damage and leave the Galvani Drone alone. Still, it’s close, so feel free to kill your opponent’s Galvanis if there’s a good reason to – for example, if it puts them off of a strong purchase, or if their Galvani Drones are helping them play around your threat.
Galvani Drone Plus Antima Comet
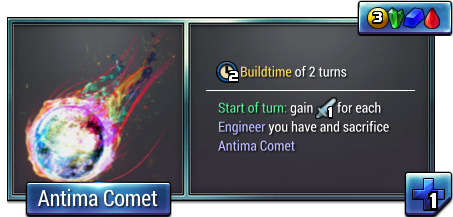
The only time you use Galvani Drone as your main source of income is when Antima Comet is in the set. Since Galvani Drone is the same efficiency as a regular Drone, if you choose to use Galvani Drone as your regular economy, you will leave yourself vulnerable to attack without any economic advantage to compensate. However, when you make your Antima Comet, you’ll deal an extra damage for each Galvani + Engineer pair you have compared to what you’d do if you’d used regular Drones. This is a huge boost to the power of your Antima Comet – Antima Comet plus Galvani Drone is arguably the strongest two-unit combination in Prismata.
Galvani plus Antima games tend to be very sharp. If your opponent commits to using Galvani + Engi pairs as the bulk of their economy on turn 1, then you either have to attack them fast (to take advantage of their inability to absorb, and also to prevent their Engineer stack from getting too big when their Antima hits), or you have to also be going galvanis + engis on turn 1 and try to beat them to the punch with Antima.
Galvani Drone Openings
Player 1 Elyot Animus: 1. DD 2. A11

This build works the same as the ordinary Elyot Animus, but I figured I’d include it because it gets such a huge power boost from Galvani Drone being in the set. It gets an extra two Gold income from being able to sink its Energy.
Player 2 Fourth Engineer: 1. DD 2. DDEE 3. DDD1

This build’s good if you want high economy as player 2 and don’t want a Conduit.
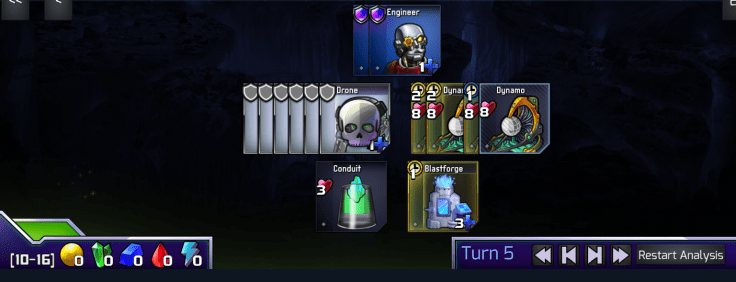
Thorium Dynamo
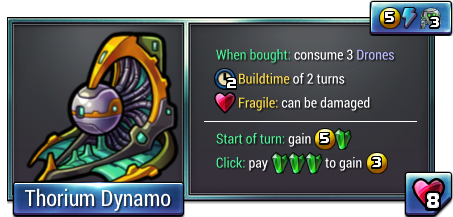
Our first alternate economy unit that’s more efficient than a regular Drone. Because of this, when Dynamo is in the set, it’s standard to rely on Dynamo for your economy, unlike Galvani or Doomed Drone. Since it’s breachproof, and since you end up going for it anyway, Dynamo is a big enabler of breachproof games.
Dynamo is quite big and clunky, so there is only one standard Dynamo opening for each player.
Thorium Dynamo Openings
Player 1 Dynamo Opening: 1. DD 2. D1 3. DD

This is by far the best Dynamo build for player 1. Although Dynamo is more efficient than Drone, it’s not so much more efficient that you want to get it on turn 1 – if you do that you waste an Energy, which loses efficiency. So instead you build a pair of Drones on turn 1 and get Dynamo on turn 2 where you can get it without wasting any Energy.
Player 1 Evil Animus 1. DD 2. D1 3. A
This build ends up being very similar to Natural Animus. To be honest, the only reason I’m including it is that it’s actually got a name. There are so many openings that are so set dependent that the only named openings tend to be the really common ones, and even those often have rather straightforward names like “third Engineer Blastforge”.
Anyway, it’s called “evil Animus”, because if Electrovore or Grimbotch are in the set and your opponent went for their standard Dynamo build, you can get shots off on your opponent without them being able to respond. That said, I’d advise steering clear of this build except when it suits the overall strategy you want to go for – Red sets where you want a medium Economy. It’s not worth going for this build in a set that isn’t right for it just to get a few pot-shots off.
Player 1 high economy Dynamo opening: 1. DD 2. D1 3. DD 4. 1DC 5. 11 C/B
This is P1’s standard high economy line. It’s very slightly better than … 4. 11, which is another build people commonly end up using for high economy. It’s also handy for going breachproof, since it gets you to four Dynamos with no Drones quickly and efficiently.
Player 2 standard Dynamo opening: 1. DD 2. 11 3. D
Less flexible than player 1’s dynamo opening, but still good, and more efficient than any of the alternatives.
Player 2 Dynamo Animus Opening: 1. DD 2. 1D 3. DA
Used when you want an Animus on a medium economy, usually in Feral Warden sets. Do this over the standard Dynamo opening when you are really scared of your opponent going for Evil Animus.
Trinity Drone

Trinity Drone is slightly less efficient than regular Drone – a Green is more expensive than a Gold – so it isn’t used as the backbone of your economy unless you’re going for breachproof. Still, if you’re going Green, you’ll always end up buying at least one of these, since it’s useful. It’s more sturdy than Thorium Dynamo, but less efficient; overall, it’s not as strong support for breachproof as Dynamo is.
There’s only one opening you should really know about with Trinity Drone:
Player 2 Trinity Opening: 1. DD 2. DDC 3. D1 + ?

Trinity Drone makes player 2’s Natural Conduit opening infinitely more flexible. From the position above, you can get a Blastforge, Animus, or Conduit plus Engineer, efficiently.
Although Trinity Drone is, in a vacuum, slightly less efficient than a regular Drone, remember that floating resources is also inefficient – like how player 2’s third Engineer opening floats 2 Gold. So, if we compare the Third Engineer Natural Conduit opening (1. DD 2. DDE 3. DDDC) to this Trinity opening, we get:

We see that the resulting positions are identical except for a few small differences. The Trinity Drone opening leaves us with one less Gold income, but one more green income – and also leaves us with a Trinity Drone which lets us convert a Green into a Gold. In other words, the Trinity opening is strictly better – you can convert the Green into a Gold if you want, or use it as a Green. This is on top of the advantage that the Trinity opening keeps your options open longer, since you don’t commit to a high economy until turn 3.
Vivid Drone:
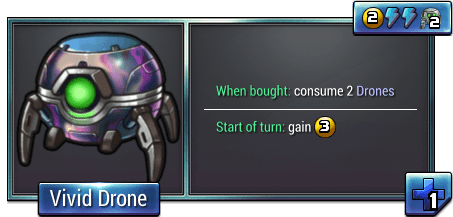
The second of the three alternate Drones that are more efficient than regular Drone. Like the other two, Vivid Drone is used nearly whenever it’s in the set. Its use can be a bit difficult to get the hang of, though, due to its clunky 2EE cost. It can be easy to screw your build up and end up being inefficient with Vivid Drone. In order to avoid this, stick to the basics: don’t float too much Gold, and don’t let Energy go to waste in the opening. Avoiding letting Energy go to waste also means you don’t want to get too many Engineers, since if you get too many, even if you can spend all the Energy for a while on Vivids, once you’re out of Drones to convert into Vivids all of the Energy will go to waste. Four Engineers is usually the most you want.
Vivid Drone is extremely breach vulnerable, meaning that Chill is stronger when Vivid is in the set. Also, Apollo can snipe Vivid, so you should avoid Vivid Drones if you think that Apollo can make it out.
Elyot Animus (1. DD 2. 1A) gets a nice upgrade when Vivid’s in the set, like it does when Galvani or Doomed Drone are.
Vivid Drone Openings
Player 1 Third Engineer 1. DD 2. DDE
Even though this build doesn’t actually use Vivid Drone in the first two turns, I’m including it since it’s got so many good followups with Vivid Drone in the set. You can either go for a high econ build, with 3. DDD, or a mid-high econ build with 3. 1DC or 1DB.
Player 1 Fourth Engineer: 1. 1EE 2. 11 3. DDDD

It’s pretty rare for this build to be correct. Only go for it if you’re 100% sure you want to go high economy, and even then, it’s not really a big deal if you go for the third Engineer build – the Third Engineer build can transpose into a build of equal efficiency to the fourth Engineer one with e.g. 3. 1DEE, with the only downside being you have to go up to a fifth Engineer.
Player 1 Zemora opening: 1. DD 2. 1CE 3. 1DC

I’m including this as an example of how Vivid can be played for mid-economy builds. You can get Zemora out along with a Vivid and a regular Drone next turn.
Player 2 Fourth Engineer: 1. 1EE 2. 1DD 3. DDDD

This is the best high econ Vivid opening for player 2. If you want, you can also get a Conduit on turn 3 by making a Vivid Drone instead of two regular Drones.
A common mistake people make is to go 1. DEE instead of 1. 1EE. Making a Drone plus two Engineers throws away an Energy on turn 1, and so ends up strictly behind the 1EE opening. Another mistake people make is to go for 1. DD 2. DDEE. This is less bad than 1. DEE, since it doesn’t waste an Energy, but it’s worse than the 1. 1EE fourth Engineer build since it’s much less flexible. You end up with 11 Gold on turn 3 instead of 12, which gives you much fewer options.
Wild Drone
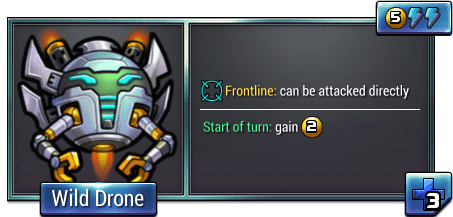
Extremely efficient, but it’s frontline. Wild Drone isn’t a particularly vulnerable unit – 3 health for 5 gold isn’t a bad price – so being frontline isn’t as big a deal as you’d think. The main downside is that your opponent can take advantage of your Wild Drones to deny absorb. Still, it’s worth buying at least 2 nearly always – the early advantage of getting an extra Gold tends to outweigh the disadvantage of having some absorb denied down the line.
Because of this, Wild Drone tends to speed up games that it’s in – since both players will usually buy at least two Wild Drones, this means that early attack is more valuable. You don’t need to go crazy in Wild Drone games – you still want enough economy to keep your tech buildings powered after Wild Drone comes out – but you should try to be more aggressive than you would if Wild wasn’t in the set.
Wild Drone Openings
Player 1 Conduit: 1. 1 2. 1C

A very good Conduit opening for player 1. Usually Green sets favour player 2, but in Wild Drone sets this reverses and player 1 is favoured.
Player 1 Fourth Engineer: 1. 1 2. 1EE 3. 11

A four Engineer opening, good for high econ.
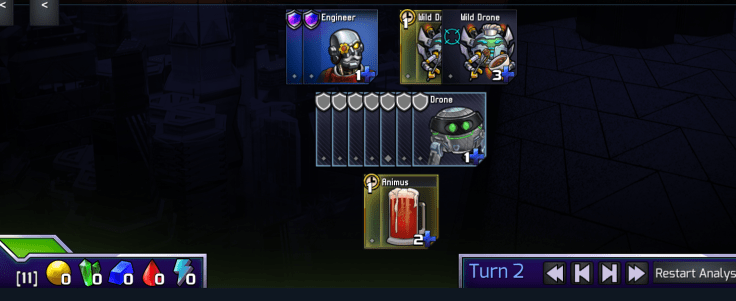
Player 2 Third Engineer: 1. 1E 2. 1D

This is a good high econ build. Getting the Wild Drone on turn 2 (instead of simply getting three Drones) is an often overlooked part of this opening. By getting the Wild Drone, you can get either a Blastforge or a Conduit on turn 3 – if you go 2. DDD, you only have 12 Gold next turn, so your only efficient option is to go 1DC.
Player 2 Animus: 1. 1 2. 1A
This is a very good Animus opening. In aggressive red sets player 1 can usually be on even footing with player 2 by using the Wild Drone version of the Elyot Animus (1. 1 2. DA), though.
Conclusion
The best part of Prismata is coming up with unique strategies for each set, but this is only possible when you have a good feel for how the different units in the set work – hopefully this post will help you use alternate Drones freely to fit the strategy you want.
-307th

great article as usual!
LikeLike
thanks so much for all the work you put into these articles. big following this blog for a couple weeks and I have improved so much. even as an experienced player these openings with alternate drones I found confusing a lot of the time, so helpful to have these all laid out like this!
LikeLiked by 1 person
This was very helpful, thanks.
LikeLike
Thanks, 307th!
LikeLike
Antima Comet ask for a high tech……I want to know the opening with Galvani to get 3 tech quickly…….
LikeLike
Usually you get a Conduit first, and then your Blastforge and Animus the next turn. Typically you get the Conduit on turn 2 for player 2, and turn 3 for player 1. Like you said, it’s a big investment.
LikeLike
ossified Drone: I am also a drone…………
I think Trinity Drone is too weak while comparing with others, espacially Thorium dynamo..
LikeLike