Prismata Library is back after a brief hiatus. There’s a tournament scheduled for October 18th, and I’d like to get back in shape.
To start with, I’m going to rank all of the absorbers in Prismata. My original absorber rankings were a bit off and forcing myself to re-evaluate every absorber seems useful.
In my original rankings, I combined a few different factors – value, clunkiness, and convenience. I mostly prioritized value when making the rankings, but not entirely, which made the rankings a bit confusing. E.g. Collossus is a very mid absorber, but has very high value, so it got a very high ranking. In this ranking, rankings will be determined *primarily by value*, with other factors like convenience only being used as tiebreakers when absorbers’ value is very close. The reason for this is two-fold: one, value is the biggest determinant of economy size, given that the absorber is played. Two, value is closely related to which absorber you should absorb on. For example, Infusion Grid is a better absorber overall than Colossus, but if you have both on the field, you definitely prefer absorbing on Colossus than Infusion Grid.
Although value is closely related to which absorber you should absorb on, it is not the same thing. This is because I define value as the *extra* value you get from using an absorber – that is, I take into account the absorber’s cost. An absorber that cost 100 gold and had 10 HP and 1 attack would in this accounting have terrible value, but given that you have it on the field, you would prefer to absorb on it rather than anything else.
Without further ado, the value-only absorber tier list! I will still discuss intangibles in each absorber’s entry.
S Tier
Centurion
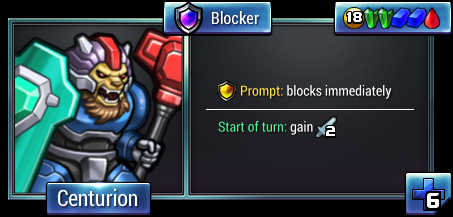
Centurion is still the best. In addition to being extremely strong value, it is prompt, which means it is nearly impossible to rush it down.
Most sets with Centurion in it will be a mirror, where both players are going high-econ Centurion. What makes the difference in these sets? Here’s a few trends I’ve noticed:
By default, the optimal economy is high, probably a bit higher than you think. When you go for a standard 3-engi build it is very tempting to cut drones at some point, especially as player 2, because you want to get stuff going. But in a Centurion set, the absorb barrier is so high that this is probably a mistake, not to mention how easy it is to end up overteched.
Often the victor is determined by who manages the initial attacker/absorb dance better. At a high level, you can actually lose a game because you built Wall first to absorb 2, and then built Centurion the next turn to absorb 5; because on the Centurion turn, your Wall is doing nothing and you end up overdefended by a large amount:

How do you avoid overdefending on your Centurion turn? Well, depending on the set and how your opponent plays, it’s not always possible. Part of the lesson here is that it can be good to hover at 1-3 damage for a bit before going up to 5, to force your opponent to absorb on something other than Centurion. On the defensive side, one way to avoid it is to absorb on something that attacks (Rhino, Urban Sentry, or Protoplasm) so that it isn’t idle on the turn that you buy Centurion. You can also consider just tanking some damage instead of absorbing.
After Centurions are bought, things move fast. Although Centurion is high value, it does not slow the game down the way other big absorbers like Defense Grid do, because some of its value comes from attack. When both players buy Centurion, the net result is simply that both players are taking 1 damage less per turn compared to if they were both absorbing on Wall. Combined with the big economies which means both players can buy lots of attack once over the absorb barrier, and this means that the game can very quickly progress to lategame stages. Plan ahead for this – this means you need to keep an eye and potentially buy your “soak in X turns” units (e.g. Sentinel, Chieftain) immediately after you buy Centurion.
Defense Grid

Promoted to S tier compared to the last tier list, because it is comparable to Centurion in value. It is more vulnerable to disruption, because it is nonprompt and a lifespan unit, and its tech requirements are a bit more onerous.
Unlike Centurion, games with defense grid don’t move particularly fast after buying it. Still, defensive supplies are often pretty important – you have three Blue so you will run through your Walls fast – so try to plan to use all of the good soak in the set.
A Tier
Energy Matrix
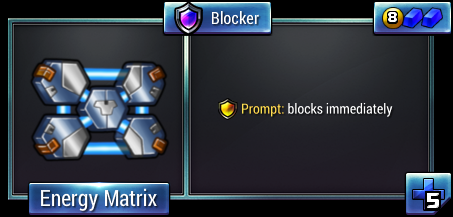
All units in A tier are approximately tied for value, right up at around 2x the value of Wall. Energy Matrix tops the list because it always realizes that value, whereas the other A tier absorbers rely on pressure which is not reliable. It is also prompt and cheap which makes it extremely convenient and easy to work into your builds.
Xeno Guardian
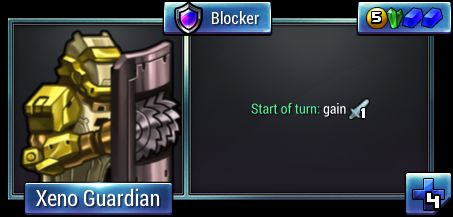
Right up there with Energy Matrix in terms of value and convenience. Because it’s non-prompt, it’s a bit less convenient, but it has the benefit of being able to double as playing around threat.
Omega Splitter

One thing I’ve realized when re-doing this list is just how crucial the pressure is from these “attack-or-absorb” absorbers is to their strength as an absorber. When Omega Splitter’s pressure is real – it’s forcing out defense that doesn’t do anything otherwise, like a Wall – then it essentially causes your opponent to instantly lose 5B on the half-turn after you buy it, never to return. That’s incredibly powerful!
When the 3 pressure it applies appropriately forces out defense from your opponent, its value is right up there with E-matrix / Xeno Guardian. On the other hand, if they can completely play around this threat, e.g. with an Urban Sentry, then Omega Splitter becomes more like an Infusion Grid-tier defender.
I think that in theory this means that the optimal economy size in games where Omega Splitter’s pressure is real should be like 25% higher compared to games where Omega Splitter is still the best absorber but its pressure isn’t real. I think?
Colossus

It’s extremely difficult to realize Colossus’s value because of how clunky it is. Also, even when you do realize its value, you now have a 1-hp 3x attacker, which makes you incredibly breach vulnerable. But, in the case where its 3 pressure is real and you can buy 4 and absorb on all of them, it is in fact going to beat pretty much any regular strategy relying on B tier absorbers.
B Tier
Doomed Mech

Like all of these potential-attacker absorbers, a lot of its value comes from its threat – if your opponent can play around it, e.g. with Borehole Patroller, then it would drop to the bottom of B tier.
Mahar Rectifier

It’s like Doomed Mech, but it doesn’t have a lifespan, it’s a bit more expensive, and you need 2 up in order to absorb each turn.
As a rare pure-green absorber, it can allow for pure green builds in the case where there is a good green attacker like Asteri Cannon, or red-green builds in the case where there isn’t much good in blue.
Infusion Grid
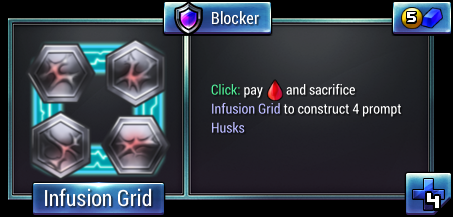
Extremely convenient as a single-blue absorber. Nice basic absorber that can be a mainstay or can be a bridge to a bigger absorber.
Urban Sentry

Very similar value to Infusion Grid. It costs a bit more, but doing 1 damage is a bit better than getting +1 absorb, so it evens out. I would put it above Infusion Grid since the 1 attack makes it a bit more useful in first-absorber situations (it realizes its value quicker) and it can play around threat, but on the other hand it does require a whole additional tech type.
Doomed Wall
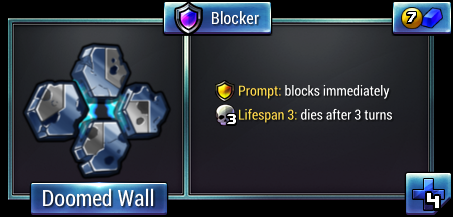
Similar to Infusion Grid in many ways, but tends to be a bit more awkward because of its lifespan. It can get frozen and denied that way, but the lifespan can even become a liability e.g. when using it as a bridge absorber. On the other hand, being Prompt means that in some scenarios it can be even more reliable and hard-to-rush than Infusion Grid.
Xaetron
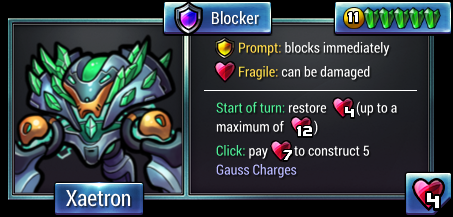
Pretty cool unit. If you buy Xaetron just-in-time and only absorb on it, it’s quite a weak absorber, like only a bit better than a Wall. However, it can be alternated with another absorber (like Wall) to get some extra value; it can play around threat when doing this; and, even if you are absorbing on Xaetron only, you can buy it a turn early and get some extra value that way. Plus you can’t really deny Xaetron absorb in the way you can for other units, unless it is restricted by its maximum health. So it is pretty handy, despite being expensive and not too high value.
Odin
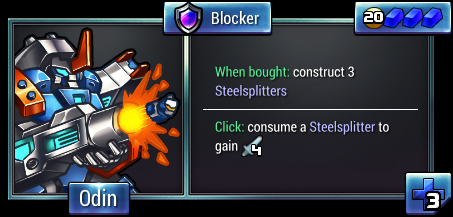
This is another of those that really depends on how effective your pressure is. In the case where Odin can force out 4 extra defense that doesn’t do anything, while holding back, it is a really strong choice for absorb, right around infusion grid level. In the case where your opponent can play around your absorb, you’re better of fjust going in with Odin.
When I try to calculate its value assuming pressure is valid it comes out very high, around energy-matrix level; but a lot of this is its offensive value, which I don’t think should count for the purposes of an absorber, so I’m putting it lower than my naive value calculation suggests.
Bombarder

You ideally want to attack with Bombarder once, then hold and absorb on it when it’s at one Stamina to get value from its pressure. Because of this you can’t easily get it in time to absorb and hold off rushes the way you can with most absorbers, which means it doesn’t encourage big economy sizes in the same way. On the other hand it has a high tech cost which can encourage a bigger economy. Overall a weird absorber that I don’t think I entirely get.
C Tier
Chieftain

I don’t usually think of this as an absorber, but in the case where you can set it up (buying a Chieftain each turn, absorbing 6 damage onto it on its first turn, then attacking twice before it disappears) it’s really pretty decent. The high amount of damage required for it to activate means that it probably isn’t as much of a factor in games though, because you don’t get the value from it until quite a bit later. This is a rare case where I’m rating it significantly below its value (value-wise it would be in B tier) simply because I think it almost never realizes its value fast enough for it to be a significant factor in econ size.
Feral Warden

Absorbing on Feral Warden means you get an attacker rather than HP out of the deal. That’s pretty dang good! Early on, Feral Warden’s absorb value is right up there with Infusion Grid. However, later as the game accelerates, its value plummets to below that of Wall; this means that in base + Feral the optimal econ size is relatively small, and is why it ended up in C tier rather than B tier.
Protoplasm
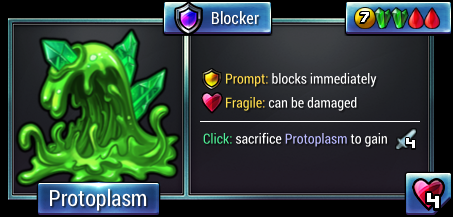
Red green absorbers are generally less powerful than blue, but can enable some interesting blue-skipping builds in the right circumstances. Fun fact about Protoplasm: even though it is higher value than Wall, in base+proto, it is still correct to go red-green-blue and absorb on wall first (in order to get out Tarsiers), then switch to absorbing on Protoplasm later.
D Tier
Wall
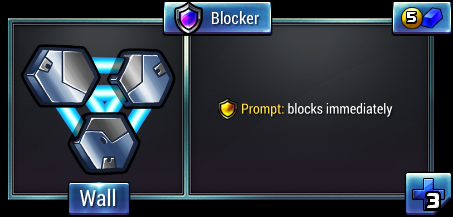
Yeah it’s cool.
Mega Drone

A bit worse to absorb on than Wall in most cases, and you shouldn’t plan on using it as an absorber since, well, there’s always Wall, but when you’re under a lot of pressure holding mega in a pinch can be OK.
Rhino Tier
Rhino

Better than nothing! About half as much value as Wall for absorb. Also, I say better than nothing, but very early on I’m not actually sure about that – when choosing whether to buy a Rhino that absorbs 1, or build a Tarsier and tanking the 1 damage, I usually go with the Rhino but it can depend.


Leave a Reply